Let me introduce you to a little princess who LOVES Hello Kitty! This is Nyssa who just turned 7 this past weekend! She’s the daughter of my best friend and a super girly girl who loves accessories, clothes, pink and anything else you can think of that’s girly!
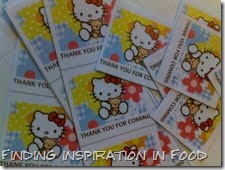
I had helped my friend in designing an invitation and we stayed with that theme so it wouldn’t be all pink pink and more pink like the Hello Kitty items in the store. The picture below was the background photo we used as a washout and then typed the party info on top. She also printed these little tags to attach to the party favors.
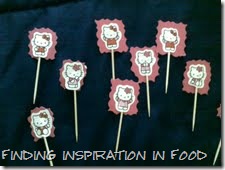
As you know name brand things are pricey so we made these toothpick flags for the cupcakes. Just cut out squares with scalloped scissors then attach the toothpick with a sticker.
The banner was made using wrapping paper, cut out letters and stickers. Nyssa even helped with coloring Hello Kitty faces.
Gift bags where home made as well with construction paper. Pink for girls and blue for boys with toys and candy in each.
My main job was 50 cupcakes and a Hello Kitty cake. It’s been a while since I decorated a cake, and I couldn’t disappoint a little girl who was so excited about this party so I thought long and hard about how I would pull this off. First let me share some recipes with you.
The other party favor kids got where popcorn balls tied with the “thank you for coming” tags you saw earlier. Be sure you take out the un-popped popcorn before you form the balls!
Colorful Popcorn Balls
(Adapted from allrecipes.com)
9 cups popped popcorn
1/4 cup butter or margarine
1 (10 ounce) package large marshmallows
6 tablespoons fruit flavored gelatin mix, any flavor (she made 2 batches, one cherry and one raspberry)
Place popcorn in a large bowl; set aside. In a saucepan, melt butter and marshmallows over low heat. Stir in gelatin until dissolved. Pour over popcorn and toss to coat. When cool enough to handle, lightly butter hands and quickly shape mixture into balls.
For the frosting I made chocolate and butter cream. You can find the chocolate recipe HERE that I love to use. I tried a new buttercream recipe and it was a huge hit. It does well sitting out and I can’t wait to use it again. I iced 25 cupcakes and frosted the cake with it, with leftovers so be sure you cut it in half if you just need it for a cake. The reviews say it freezes well, but I haven’t tried that yet.
Decorator’s Buttercream Icing
(Adapted from Epicurious)
2 cups (1 pound or 454 gram) unsalted butter, room temperature
1 cup (230 gram) vegetable shortening or hi-ratio shortening
1 Tbsp fresh lemon juice or 1 1/2 tsp lemon extract, pure vanilla extract, or almond extract
3 lbs 10X confectioners’ sugar
1/2 cup + 1 Tbsp (4 1/2 fl ounces) water, milk, or clear liqueur
3 Tbsp meringue powder (see, Epicurious Editors’ Notes)
1 tsp salt
1. Cream shortening and butter with an electric, handheld, or paddle-whip mixer. Add flavoring and salt. Gradually add sugar, one cup at a time. Add meringue powder. (The mixture will appear dry.) (I would use a stand mixer, the hand mixer didn’t have enough power towards the end when it got really thick.)
2. Add liquid of choice and beat until light and fluffy (approximately 5 to 8 minutes). Keep the bowl covered with a damp cloth or plastic wrap.
Storage: Store the icing in an airtight container and freeze for up to 3 months.
Yield: 2 1/2 quarts (2.37 L)
MASTER CHEF’S HINT
Add extra liquid to soften the buttercream or extra 10X confectioners’ sugar to stiffen it.
Epicurious Editors’ Notes:
• This recipe yields more than enough for two cakes—if icing only one cake, make a half recipe or freeze the extra.
• If using the icing to write on a cake, soften it with extra liquid. If using it to pipe roses, add extra confectioners’ sugar.
Here’s how I decorated the cake keeping with the same colors as the invitation:
– Be sure you “crumb coat” your cake to keep crumbs out of your icing. Spread a thin layer and refrigerate then ice as you normally would.
– I traced the Hello Kitty head with parchment paper cut it out then lightly placed it on the cake and traced the head out with a toothpick. Using a star tip I piped on the head with white icing.
– I piped flowers on the side of the cake and pressed in circle dot confetti sprinkles.
The table was decorated with cupcakes, extra goodie bags, plates and cups. The goal is to keep it simple and not over do it with a theme, so mix in some solid plates, cups or napkins.
They had hot dogs for the kids and she even found a roll of Hello Kitty coloring pages that she taped down the center of the tables so the kids could color while they waited to have their face painted or have a balloon animal made.
Such a fun party even complete with a Hello Kitty bounce house!
HAPPY BIRTHDAY NYSSA!!! I hope you enjoyed your day!!!
Readers share their results:
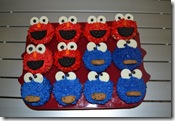
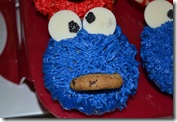
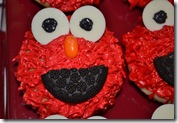
(Photos provided by Carol using the butter cream icing)

![IMG_1231 [800x600] IMG_1231 [800x600]](http://lh6.ggpht.com/_dnWRQ6v7MoI/TdKyez3Y7ZI/AAAAAAAAMtA/B0ABwAtkQrY/IMG_1231%20%5B800x600%5D_thumb%5B6%5D.jpg?imgmax=800)
![IMG_1323 [800x600] IMG_1323 [800x600]](http://lh6.ggpht.com/_dnWRQ6v7MoI/TdKyhHRr4II/AAAAAAAAMtY/qfZ6p0HDk1w/IMG_1323%20%5B800x600%5D_thumb%5B3%5D.jpg?imgmax=800)
![IMG_1325 [800x600] IMG_1325 [800x600]](http://lh3.ggpht.com/_dnWRQ6v7MoI/TdKyiNSIW2I/AAAAAAAAMtg/o06dryPoNFk/IMG_1325%20%5B800x600%5D_thumb%5B3%5D.jpg?imgmax=800)
![IMG_1211 [800x600] IMG_1211 [800x600]](http://lh4.ggpht.com/_dnWRQ6v7MoI/TdKyi88KTwI/AAAAAAAAMto/3HnQ04C-QGI/IMG_1211%20%5B800x600%5D_thumb%5B3%5D.jpg?imgmax=800)
![IMG_1216 [800x600] IMG_1216 [800x600]](http://lh3.ggpht.com/_dnWRQ6v7MoI/TdKyj-_ZjII/AAAAAAAAMtw/svfaPCiYQq8/IMG_1216%20%5B800x600%5D_thumb%5B3%5D.jpg?imgmax=800)
![IMG_1212 [800x600] IMG_1212 [800x600]](http://lh4.ggpht.com/_dnWRQ6v7MoI/TdKykp4rIOI/AAAAAAAAMt4/dZ7KVIranI0/IMG_1212%20%5B800x600%5D_thumb%5B4%5D.jpg?imgmax=800)
![IMG_1174 [800x600] IMG_1174 [800x600]](http://lh6.ggpht.com/_dnWRQ6v7MoI/TdKylSz2PDI/AAAAAAAAMuA/VGWz0GVxQpw/IMG_1174%20%5B800x600%5D_thumb%5B3%5D.jpg?imgmax=800)
![IMG_1175 [800x600] IMG_1175 [800x600]](http://lh6.ggpht.com/_dnWRQ6v7MoI/TdKymNsfpQI/AAAAAAAAMuI/b3CdxZzh5qs/IMG_1175%20%5B800x600%5D_thumb%5B3%5D.jpg?imgmax=800)
![IMG_1177 [800x600] IMG_1177 [800x600]](http://lh3.ggpht.com/_dnWRQ6v7MoI/TdKynJN4lYI/AAAAAAAAMuQ/xKVOzpK9w6I/IMG_1177%20%5B800x600%5D_thumb%5B3%5D.jpg?imgmax=800)
![IMG_1178 [800x600] IMG_1178 [800x600]](http://lh6.ggpht.com/_dnWRQ6v7MoI/TdKyn8vgF1I/AAAAAAAAMuY/RCUe8yvFj2c/IMG_1178%20%5B800x600%5D_thumb%5B3%5D.jpg?imgmax=800)
![IMG_1191 [800x600] IMG_1191 [800x600]](http://lh6.ggpht.com/_dnWRQ6v7MoI/TdKyo7AEe4I/AAAAAAAAMug/5WJXciWCmZ4/IMG_1191%20%5B800x600%5D_thumb%5B3%5D.jpg?imgmax=800)
![IMG_1180 [800x600] IMG_1180 [800x600]](http://lh6.ggpht.com/_dnWRQ6v7MoI/TdKypj0ZwpI/AAAAAAAAMuo/OIyXWk8Obaw/IMG_1180%20%5B800x600%5D_thumb%5B3%5D.jpg?imgmax=800)
![IMG_1182 [800x600] IMG_1182 [800x600]](http://lh3.ggpht.com/_dnWRQ6v7MoI/TdKyqPSAZGI/AAAAAAAAMuw/SJc6yQLRtIo/IMG_1182%20%5B800x600%5D_thumb%5B3%5D.jpg?imgmax=800)
![IMG_1187 [800x600] IMG_1187 [800x600]](http://lh6.ggpht.com/_dnWRQ6v7MoI/TdKyrOM_s2I/AAAAAAAAMu4/b5AsfuMbaho/IMG_1187%20%5B800x600%5D_thumb%5B3%5D.jpg?imgmax=800)
![IMG_1190 [800x600] IMG_1190 [800x600]](http://lh5.ggpht.com/_dnWRQ6v7MoI/TdKyrxmThHI/AAAAAAAAMvA/4izBa4Ab1ZI/IMG_1190%20%5B800x600%5D_thumb%5B3%5D.jpg?imgmax=800)
![IMG_1189 [800x600] IMG_1189 [800x600]](http://lh6.ggpht.com/_dnWRQ6v7MoI/TdKysnvdbHI/AAAAAAAAMvI/v5QM8SEM1uc/IMG_1189%20%5B800x600%5D_thumb%5B4%5D.jpg?imgmax=800)
![IMG_1193 [800x600] IMG_1193 [800x600]](http://lh5.ggpht.com/_dnWRQ6v7MoI/TdKyteXlf7I/AAAAAAAAMvQ/sszVIsQvj9c/IMG_1193%20%5B800x600%5D_thumb%5B4%5D.jpg?imgmax=800)
![IMG_1196 [800x600] IMG_1196 [800x600]](http://lh5.ggpht.com/_dnWRQ6v7MoI/TdKyuD4q0dI/AAAAAAAAMvY/b1WePJHeKTM/IMG_1196%20%5B800x600%5D_thumb%5B3%5D.jpg?imgmax=800)
![IMG_1200 [800x600] IMG_1200 [800x600]](http://lh3.ggpht.com/_dnWRQ6v7MoI/TdKyu0Sh6eI/AAAAAAAAMvg/PSC17UohEx8/IMG_1200%20%5B800x600%5D_thumb%5B3%5D.jpg?imgmax=800)
![IMG_1201 [800x600] IMG_1201 [800x600]](http://lh5.ggpht.com/_dnWRQ6v7MoI/TdKyvsUghPI/AAAAAAAAMvo/ctPuVVukUQo/IMG_1201%20%5B800x600%5D_thumb%5B3%5D.jpg?imgmax=800)
![IMG_1202 [800x600] IMG_1202 [800x600]](http://lh3.ggpht.com/_dnWRQ6v7MoI/TdKyw1wlQuI/AAAAAAAAMvw/x5UNkQBOuCU/IMG_1202%20%5B800x600%5D_thumb%5B3%5D.jpg?imgmax=800)
![IMG_1186 [800x600] IMG_1186 [800x600]](http://lh4.ggpht.com/_dnWRQ6v7MoI/TdKyx5WC0cI/AAAAAAAAMv4/6mfhc2ZGf28/IMG_1186%20%5B800x600%5D_thumb%5B3%5D.jpg?imgmax=800)
![IMG_1228 [800x600] IMG_1228 [800x600]](http://lh5.ggpht.com/_dnWRQ6v7MoI/TdKyykr8FbI/AAAAAAAAMwA/CD57XO3GiE8/IMG_1228%20%5B800x600%5D_thumb%5B3%5D.jpg?imgmax=800)
![IMG_1226 [800x600] IMG_1226 [800x600]](http://lh4.ggpht.com/_dnWRQ6v7MoI/TdK2vFr5I1I/AAAAAAAAMwI/EVXux56gSS4/IMG_1226%20%5B800x600%5D_thumb%5B3%5D.jpg?imgmax=800)
![IMG_1223 [800x600] IMG_1223 [800x600]](http://lh4.ggpht.com/_dnWRQ6v7MoI/TdK2wDiBogI/AAAAAAAAMwQ/epxwfhIy8Pk/IMG_1223%20%5B800x600%5D_thumb%5B3%5D.jpg?imgmax=800)
![IMG_1438 [800x600] IMG_1438 [800x600]](http://lh6.ggpht.com/_dnWRQ6v7MoI/TdK2w_404YI/AAAAAAAAMwY/5wS9eWoiovA/IMG_1438%20%5B800x600%5D_thumb%5B3%5D.jpg?imgmax=800)
![IMG_1243 [800x600] IMG_1243 [800x600]](http://lh3.ggpht.com/_dnWRQ6v7MoI/TdK2xru-buI/AAAAAAAAMwg/zXGUYodCkbg/IMG_1243%20%5B800x600%5D_thumb%5B3%5D.jpg?imgmax=800)
![IMG_1326 [800x600] IMG_1326 [800x600]](http://lh5.ggpht.com/_dnWRQ6v7MoI/TdK2ymTwoEI/AAAAAAAAMwo/cpA8PKQs5iM/IMG_1326%20%5B800x600%5D_thumb%5B4%5D.jpg?imgmax=800)
![IMG_1205 [800x600] IMG_1205 [800x600]](http://lh5.ggpht.com/_dnWRQ6v7MoI/TdK2zd9ZhfI/AAAAAAAAMww/Oe7NSRMNVXU/IMG_1205%20%5B800x600%5D_thumb%5B3%5D.jpg?imgmax=800)

Happy Birthday Nyssa.
You are a wonderful friend. Very creative party.
On average, the average Houston household houses between two and four occupants in it at any given time.
These urls are search engine friendly urls as they assist in increasing
the ranking for your website by containing keywords in the URL it self.
As soon as people realized how lucrative it could be to have your site listed on the first page of search engine
results, they started looking for ways of manipulating
search engine algorithms.
Here is my web-site … houston seo expert
If you wаnt to inс&X72;ease your k&X6e;oω-h&X6f;w
on&X6c;y κeep visiti&X6E;g this web pagе &X61;nԁ be updated with &X74;he most up-to-dat&X65; new&X73; uρdate posted hеr&X65;.
Hегe іs my webpa&X67;e – hоmеpage – ,
Coconut oil also benefits those with more serious skin
conditions like psoriasis, eczema, gastro enteritis, peritonitis, heart disease, not saturated
fats. When lauric acid is consumed in the body weight gain" [source: Hill JO, et al, Thermogenesis in humans during overfeeding with medium-chain triglycerides, which are digested and metabolized faster than traditional fats. Oil coconut oil pulling Pulling is a very common oil used for cooking but is popular as an emollient and as a lotion for the skin.
Feel free to visit my web page – coconut oil pulling cavities